Thursday, November 10, 2011

EASY Homemade Beer Bread

Beer Bread! Yum! That is all I have to say.

I have never made beer bread homemade before, I have always gotten mixes to make it so I decided to give it a shot. I found an extremely easy recipe and I was thinking that "this is wayyy too good to be true". Guess what? It wasn't, the bread was awesomely delicious! I think next time I make it I might add some cheese or some spices.


I found this recipe at My Baking Addiction. Love this site!

For 1 loaf this is what you will need:
3 cups self-rising flour
1/3 cup sugar
1 teaspoon kosher salt
12 ounces beer (I used Leinenkugals Red Lager)
2 tablespoons melted butter


Directions
1. Preheat the oven to 375 degrees F.
2. Butter an 8×4 inch loaf pan and set aside. In a large bowl, combine the flour, sugar, salt and beer; mix well. The mixture will be sticky. Pour into the loaf 
pan and bake for about 55 minutes.
3. At the last three minutes of baking, remove from oven, brush the top of the loaf with the melted butter and return to oven for the final three minutes of baking.


The mix, you can see how sticky it is.

mmmm, getting ready to go into the oven.

Fresh out of the oven! I put a little garlic salt with the butter that went on top.

Look how good that looks!

Melted butter. So good.


Use whatever type of beer you want, switch it up, whatever you do, just make this bread if you want an easy bread making day :)

I partied @
Pin It!

Tuesday, November 8, 2011

Salted Caramel Butter Bars & Gooey Chocolate Peanut Butter Bars!

I am venturing away from cupcakes for awhile because I wanted to try out some of these good looking bar recipes I have been seeing everywhere. As a matter of fact, I made two bars, two days in a row. The first one was a gooey chocolate peanut butter bar (was really craving peanut butter that day!) and the second one was a salted caramel butter bar (amazing!).

The peanut butter bars recipe was found in a 'Karo Best Cookies & Bars' recipe book that I have had forever. These bars are truly ooey and gooey!

Here is what you will need:
For the crust:
3/4 cup all-purpose flour
1/3 cup sugar
1/4 cup cornstarch
1/2 cup butter or margarine, softened

For the filling:
2 eggs
1/2 cup Karo light corn syrup
1/2 cup brown sugar
1/4 cup creamy peanut butter
1 teaspoon vanilla extract
1/4 teaspoon salt
1/2 cup flaked coconut
1/2 semi-sweet chocolate chips

*I left out the coconut because honestly, I hate coconut! I substituted in some toffee bits, yum!

Here is what you do:
To make the crust:
Combine the flour, sugar and corn starch in a medium bowl. Cut in the butter until mixture is crumbly. Press into greased 13x9-inch pan.
Bake in a preheated 350 degree F oven for 15 to 18 minutes or until crust is lightly browned.

To make the filling:
Beat eggs, corn syrup, brown sugar, peanut butter, vanilla and salt in a medium mixing bowl. Stir in coconut (toffee bits) and chocolate chips. Pour over crust. Return to oven.
Bake an additional 20 to 25 minutes, or until mixture is golden. Cool on wire rack and cut into bars.

Now let me tell you first that I had a 9x9-inch pan only so this is what I used. You are supposed to be able to see the chocolate chips peeking out of the top but since I had more filling due to a smaller pan, you could not see my chocolate chips. They were still to die for!


Seriously, doesn't that look so gooey? Oh, trust me, it was!


Ok, lets move on to the salted caramel butter bars. These were my favorite of the two bars and I only got good reviews on them!

Lets get to it, heres what you will need:
For the crust:
1 lb salted butter, room temperature
1 cup sugar
1 1/2 cups powdered sugar
2 tablespoons vanilla
4 cups all purpose flour

For the filling:
1 bag caramel candies (about 50)
1/3 cup milk
1/2 teaspoon vanilla
1 tablespoon coarse sea salt

Directions:
For the crust:
In a large bowl, combine the butter and sugars. Using a mixer on medium speed, beat together until creamy. Add the vanilla and beat until combined. Sift the flour into the butter mixture and beat on low speed until a smooth, soft dough forms.

Preheat oven to 325 degrees F.
Spray a 9x13-inch pan (once again, I used a 9x9) lightly with non-stick cooking spray. Press one-third of the dough evenly into the pan to form a bottom crust.
Bake until firm and the edges are a pale golden brown, approximately 20 minutes. Transfer pan to a wire rack and let cool about 15 minutes.
Cover remaining dough and put into fridge to chill.

While the bottom crust is baking and the remaining dough is chilling, make the caramel filling.

To make the filling:
Place the caramels into a microwave safe bowl and add the milk. Microwave on high for 1 minute. Remove and stir until smooth. If caramels are not completely melted, return to microwave and heat for 30 seconds. Repeat until completely melted and smooth. Add vanilla and mix well.

Pour the caramel filling over the baked crust. Sprinkle sea salt over caramel. Take the dough out of the fridge and crumble it evenly over the caramel. Return the pan to the oven and bake until the filling is bubbly and the crumbled shortbread topping is lightly brown, about 25-30 minutes. Let cool before cutting into squares.


Beautiful, browned crust!

Salted caramel layer.

Crumble the chilled dough on top of caramel layer.


I thought that I waited long enough before cutting the first square, but was I wrong! Oh how I would love to have another one of these in front of me!

These bars would be great to bring to any event, just don't expect to have any left over ;)

I partied @
Pin It!

Wednesday, November 2, 2011

Cupcake fail, but still pretty :)

A couple weeks ago I just wanted to make about 4 cupcakes, because it was the weekend, didn't have anyone to share the cupcakes with and I didn't want to have to eat them all myself so I searched for a recipe that would only make this many cupcakes.

I ended up coming across a recipe that makes 2 cupcakes, so I tripled it. BAD MISTAKE!

I added some peanut butter M&M's, thinking that these would turn out so delicious, but was I terribly wronge. They came out of the oven smelling soooo good, but let me tell you, I have no idea if it was the M&M's or the recipe but they were not tasty...at all.

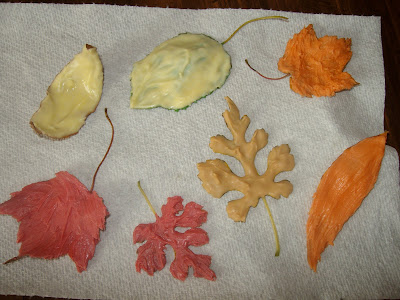
I will still share the pictures because they did turn out pretty neat. I made some chocolate leaves to put on top!


Above is where I put M&M's in the batter, then i pushed some down farther so they were all spread out. In the end needless to say, they all went to the bottom.


All to the bottom. They don't look too bad huh?


The chocolate leaves getting ready to go into the refridgerator!


Even though these cupcakes could not be enjoyed by eating, I still enjoyed making them! Just shows that experimenting is not all a bad thing.
Pin It!

Mini Pumpkin Pies!

HAPPY HALLOWEEN!!! 
Well, only a few days late but better now than never right?

I would like to share what I made for a Halloween party. I wanted something little, but still tasty so I made mini pumpkin pies that I found on Bakerella. Very cute and delicious!

I am not a big pumpkin pie fan, but surprisingly, I really liked these little guys :)

Here is the low down on what you will need:
  • 2 refrigerated ready-to roll pie crusts
  • 8 oz cream cheese, softened
  • 1/2 cup sugar
  • 1 cup canned pumpkin
  • 3 eggs
  • 1 tsp vanilla
  • 1 tsp pumpkin pie spice
  • pumpkin shaped cookie cutter
  • 1/2 cup chocolate morsels
  • vegetable oil
  • re-sealable plastic bags

Directions:

1. Preheat oven to 350 degrees F.
2. Use cookie cutter to cut pumpkin shapes from each pie crust. You will need to roll the dough a little thiner than how it comes out of the box.
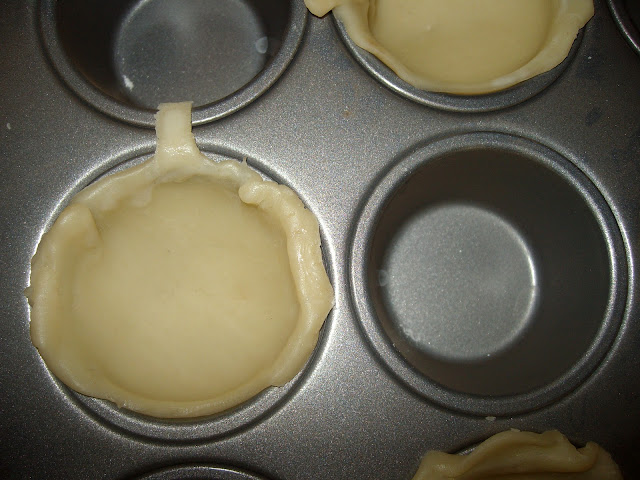
3. Press dough shapes into a 24 mini muffin tray, alternating cups to make sure they do not run into each other.
4. Apply eggs white from one egg to the top edges of each pie.
5. Mix cream cheese, sugar, canned pumpkin, remaining 2 eggs, vanilla and pumpkin pie spice together until completely combined.
6. Spoon mixture into each pumpkin shaped crust.
7. Bake for 12-15 minutes.
8. Remove pies to cool.
9. To decorate, melt chocolate and add a little vegetable oil to make the chocolate more fluid. Trasfer to a re-sealable plastic bag and cut off tip to drizzle over pies, or draw faces.

My first batch did not turn out the greatest as you can see...


I needed to rethink what I did and decided I would use more dough and make bigger pumpkins. It worked great for the second batch!


Decorating time!! I drizzled my chocolate!


I even had a guest ;)


Oh how I love the holiday's!
Pin It!