Tuesday, February 21, 2012

Somoas!

Girl Scout cookies are, pardon my french, the bomb!!!
I'm sure I'm not alone in thinking this way. I could sit down and eat a whole box or 5 myself. Hey, just stating the obvious here.

Now these cookies were quite the process to make. Don't get me wrong though, I loved these so much that I would make them again in a heart beat!

There are a few more steps in making these cookies, but all steps are very easy. Lets get to it!

What you will need for the cookies:
1 cup butter, softened
1/2 cup sugar
2 cups all purpose flour
1/4 teaspoon baking powder
1/2 teaspoon salt
1/2 teaspoon vanilla extract
2 tablespoons milk

And this is what you will need for the topping:
3 cups shredded coconut (I used sweetened)
12 ounce bag of caramels
1/4 teaspoon salt
3 tablespoons milk
8 ounces semisweet chocolate

Ready for the directions?
1. Preheat oven to 350 degrees F.
2. Spread coconut evenly on a parchment lined baking sheet and toast for 20 minutes, stirring every 5 minutes until coconut is golden. Cool on baking sheet, stirring occasionally. Set aside.
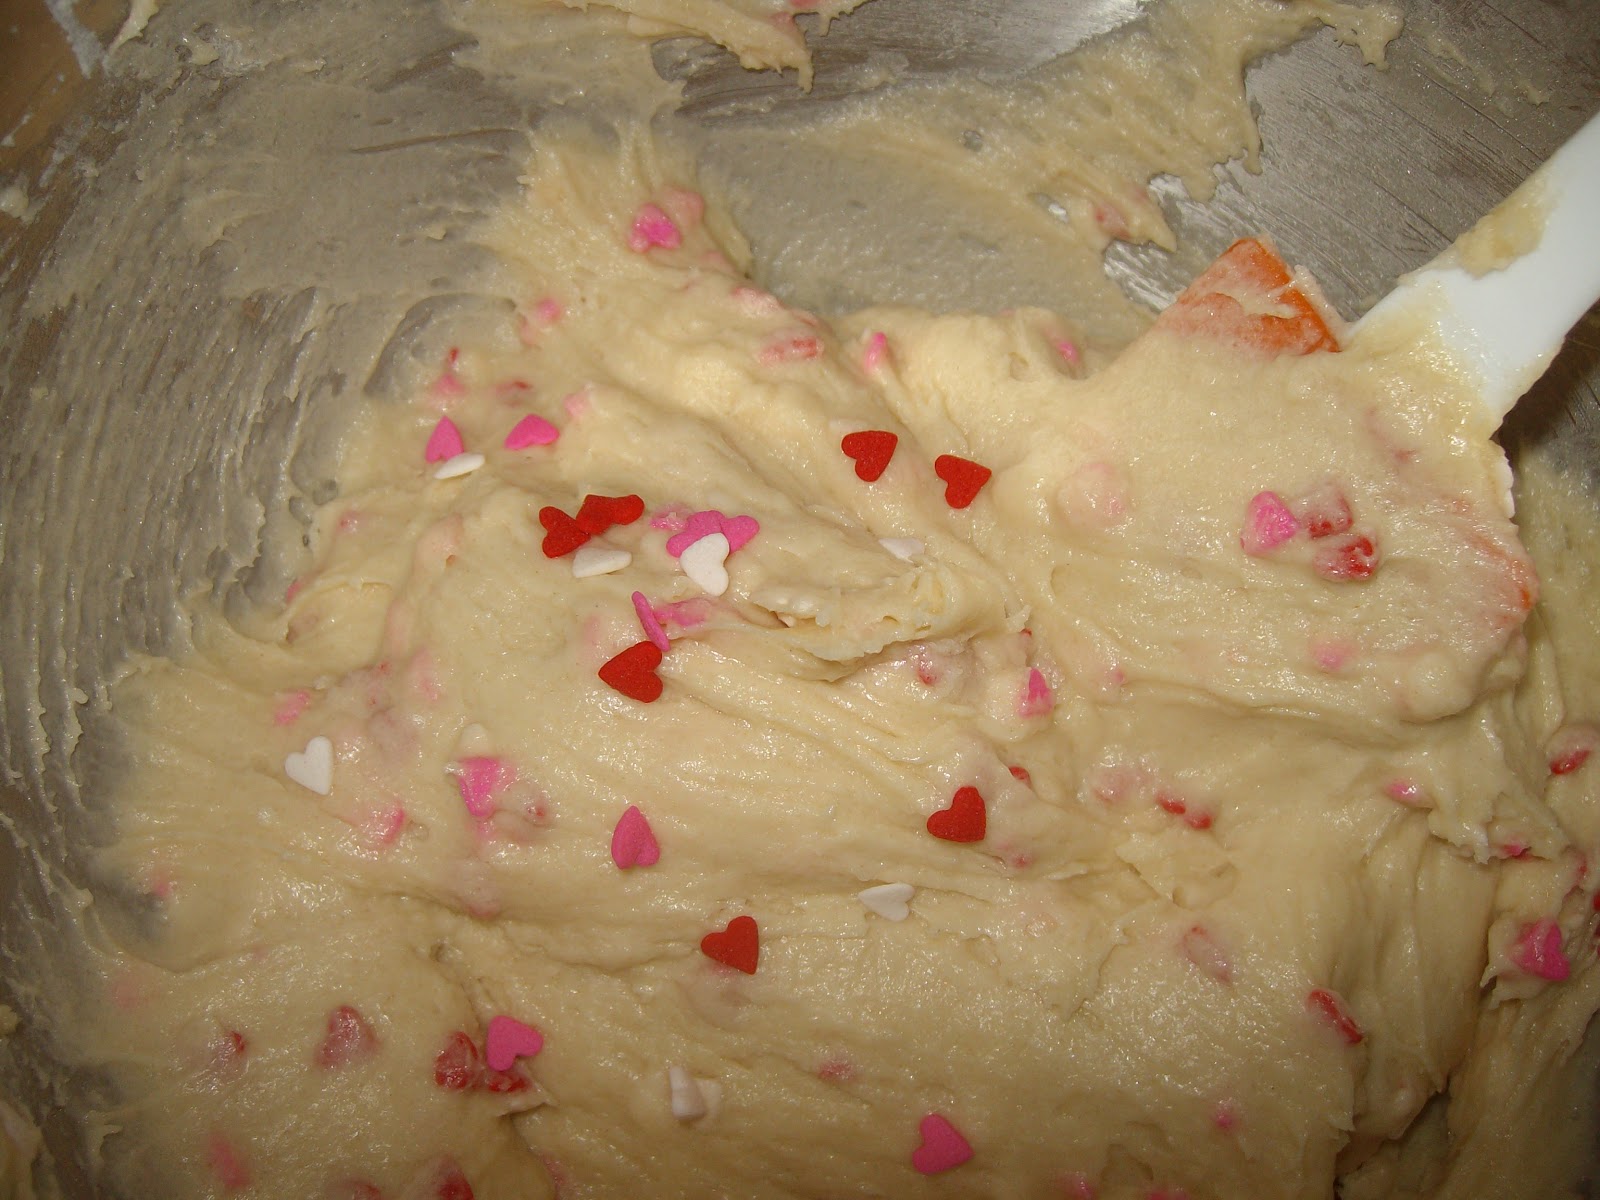
3. In a large mixing bowl, cream together butter and sugar. Mix in flour, baking powder and salt at a low speed, followed by milk and vanilla, adding in the milk as needed to make the dough come together without being sticky.
It will all come together!
Told ya! :)
4. Roll the dough (working in 2-3 batches) out between pieces of wax paper to about 1/4 inch thickness. Use cookies cutters to cut out cookies. I wanted some fun shapes as well as the circles so I used some flower cutters!
5. Place cutouts on a parchment lined baking sheet and bake for 10-12 minutes, until bottoms are lightly browned and cookies are set. Cool for a few minutes on the baking sheet then transfer to a wire rack to cool completely.
6. Unwrap the caramels and place in a large microwavable safe bowl with the milk and salt. Microwave on high for 3-4 minutes, stirring a few times to help melt. When smooth, fold in toasted coconut.
7. Spread coconut topping on cooled cookies. Reheat caramel if it starts to get too firm. This was probably the hardest part as you had to be a bit rough to get that caramel to stick on the cookie, but gentle enough not to break the cookie. Stick with it, the end result is awesome!

8. While topping sets up, melt chocolate in a small bowl. Dip the base of each cookie into the chocolate and place on a clean piece of parchment paper.
9. With leftover chocolate, drizzle over tops of cookies. (I skipped this step as it was getting late and I needed to get some beauty rest..ok, I just needed to go to bed as I kept snacking on broken cookies and leftover caramel!)

I almost feel bad saying these taste better than the real girl scout cookies. I'm sure I still won't be able to say no when one of those cute little girlies walks up and asks me if I want to buy a box...I am such a sucker for sweets!

(Is that raspberry muffins I see on the plate with those girl scout cookies? Ok, maybe I made them on the same day, can't help it when I am on a roll!)
Go ahead, wow everyone with these cookies! I got great reviews on them, next time maybe I will try the peanut butter ones..

I partied @
Pin It!

Raspberry muffins

It's muffin time again!
I can never get sick of too many muffins. Is it even possible?
I had bought a bag of frozen raspberries in the plan to make some smoothies, then I just wasn't craving a smoothie anymore so I decided to make some muffins!
Muffins are the perfect breakfast food...next to a BK breakfast sandwich that is...

This is the second muffin I have made in a short time..maybe I am addicted. Do they have muffin counseling?
"Hi, my name is Jamie and I am addicted to muffins." ohh boy I just made myself smile there, could be the long shift at work I had today. Maybe it's time to go to bed.

Shall we get on to how to make these delicious things? I think so!

What you will need for the sreusel:
2/3 cup all purpose flour
1/3 cup brown sugar
1/8 teaspoon salt
1/4 teaspoon ground ginger
4 tablespoons butter, cold

What you will need for the muffins:
2 cups all purpose flour
1 1/4 teaspoons baking powder
1/4 teaspoon salt
3 tablespoons butter, melted and cooled
1 cup sugar
1 large egg
3/4 cup buttermilk
1 teaspoon vanilla extract
1/4 teaspoon almond extract
1 1/2 cups frozen raspberries


Directions for streusel:
1. In a small bowl, stir together all dry ingredients, then cut the butter into small pieces and add to flour mixture.
2. Rub in butter thoroughly until mixture is very fine and sandy.
3. Pick up the streusel mixture and squeeze it in your hand to form small clumps, repeating until streusel appears to have a much coarser texture.

Directions for muffins:
1. Preheat oven to 350 degrees F. Line a standard muffin tin with 12 liners.
2. In a medium bowl, whisk together flour, baking powder and salt.
3. In a large bowl, stir together melted butter, sugar and egg until well combined. Stir in half the flour mixture, followed by the buttermilk, vanilla extract and almond extract. Stir in remaining flour mixture, just until combined.
4. Toss raspberries in 2 teaspoons of flour to keep them from bleeding. Fold in raspberries.
5. Divide muffin batter evenly into prepared baking cups.
(you are probably wondering why my batter is so pink, well I wanted it that way so I did not toss my raspberries in the flour. I wanted them to be pretty in pink!)
6. Divide streusel mixture over the muffins.

(I chose to do half with streusel and half topped with sanding sugar.)
7. Bake muffins for 20-23 minutes. Turn muffins out onto a wire rack to cool completely.

These raspberry muffins turned out so good! They tasted amazing and looked very pretty too!
Take a look for yourself!

These just gave me a reason to want to get up in the morning!
Streusel or no streusel? That is the question!

&
Pin It!

Monday, February 20, 2012

Deep fried chicken and beer cheese dip!

Your probably thinking "Hold up Jamie, this is not a cupcake!" I know, I know but these recipes are just too good not to share. They are not just good, they are so easy to prepare as well. I'll start with the beer cheese dip. (Oh how I wish I had a bowl at this moment)

To make this dip you will need:

  • 2 packages (8 ounces each) cream cheese, softened
  • 1/3 cup beer or nonalcoholic beer
  • 1 envelope ranch salad dressing mix
  • 2 cups (8 ounces) shredded cheddar cheese
  • Pretzels (or whatever you want to dip into this deliciousness!)

Are you ready to see how easy this is? Brace yourself...
In a large bowl, beat the cream cheese, beer and dressing mix until smooth. Stir in cheddar cheese. Eat & serve. Refrigerate any leftovers...leftovers, ha!
I am serious, that's all it is! I prefer to dip pretzels just because I like the salty taste, but go ahead and try crackers, bread sticks, anything!
Now to the chicken. I have a deep fryer and realized the other night that it hasn't been used in awhile. Maybe that is because I am trying to do this whole healthy eating thing, yeah right, like that's going well by the looks of it huh!? We decided we wanted to make some crispy chicken sandwiches so I ended up going on Google and found a Triple Dipped Fried Chicken recipe. Makes my mouth water just thinking about it. The recipe can be found here @ All Recipes.com
After the second dip into the batter, I almost couldn't believe that it was going to fit IN my deep fryer.
It fit folks, and it was amazing!
To tell you the truth, it came out so crispy on the outside and juicy on the inside that I didn't even want a sandwich anymore, I wanted to eat it as it was! Not to mention the stinkin' things were so big after the triple dip that it would have been a bit hard to eat it on a bun!
I'll stop holding back and let you see these beauties!
I know the picture is not that pretty, but I take pretty pictures of treats, not meats. :)
If you are a crispy chicken lover as I am, I highly recommend this. Go ahead, give it a try I bet you can't stop after 1 bite!

I partied @
&
&
&
Pin It!

Tuesday, February 14, 2012

Happy Valentine's Day!

Happy Valentine's Day everyone! I hope everyone's day is as sweet as the treats we bake! :)

My latest V-Day goodie? Red Velvet donuts! mmm mmm good! Want to make your own? There's many recipes out there, just take your pick! (Took me forever to find a donut pan, what's up with that!?)

Enjoy today ladies...it wont last long, just like this donut! ;)
Pin It!

Monday, February 13, 2012

White chocolate s'mores gooey cake bars!

White chocolate s'mores gooey cake bars...try saying that 3 times fast!

I must give special credit to Picky Palate for she made one heck of a recipe and was so generous to share! I found this on Pinterest and knew just by the picture that it was going to be one heck of a bar!

There is not much to making these, and they turn out like you put sooo much work into them!

Here is what you will need:
  • 1 box yellow cake mix
  • 1 large egg
  • 1 stick unsalted butter, softened
  • 4 1/2 full graham crackers
  • 10 ounce bag white chocolate chips
  • 2 cups mini marshmallows
  • 1/2 cup sweetened condensed milk
Sounds good and you don't even know what to do with it all yet!

Here is what you do:
1. Preheat oven to 350 degrees F. and line an 8×8 inch baking pan with tin foil that’s been sprayed with cooking spray. Make sure foil goes all the way up and over the edges of the pan.
2. Place cake mix, egg, and butter into a large mixing bowl. Mix with hands until a nice dough forms. 3.Press half of the dough into the bottom of the prepared pan.

Then layer on the graham crackers like so...

Then layer on the white chocolate chips like so...

 And then the marshmallows!

Now you will want to top with the remaining half of dough, pressing evenly.
(I might have used a little too much on the bottom crust so I didn't have enough to cover the whole top...oh well it still tasted good!)

Drizzle sweetened condensed milk over the top...

Then bake for 28-33 minutes, until cooked through and golden brown on top. Remove from oven.

 Let cool for 5 minutes then take a plastic knife and run along edges to loosen the marshmallow. Let cool completely then remove bars from pan with foil edges. Cut bars into squares and serve.
These pretty much tasted, well, awesome! I will warn you though, if you make these don't bite off more than you can chew....trust me! These are so rich, have a glass of milk on hand! :) These are a keeper!

I partied @
Pin It!

Chocolate Covered Strawberry Cupcakes

Here I am on the whole Valentine's Day treats again. You can never have too many V-Day goodies though! I originally wanted to make the chocolate covered strawberry cupcakes over at I Heart Nap Time because to be honest, her cupcakes looked like heaven! I had gotten all the ingredients (well, what I thought was all of them) to make these and realized that after all the cupcakes were baked and cooling, I didn't have what was needed to make ganache. Rats!

What to do, what to do...? Improvise! Duh Jamie!

So what I did was made just a basic chocolate cupcake. Then was thinking how I could spice them up a bit and remember that my mom had given me this Mr. Foods baking with chocolate cookbook, there had to be something in there!
Doesn't he just look adorable!?

What I chose to do was make a fudge filling for my cupcakes. To do so you will need:
1 package (8 ounces) cream cheese, softened
1/3 cup sugar
1 egg
1 cup semisweet chocolate chips, divided

And here is what you do:
1. In a large bowl, with an electric beater on medium speed, beat the cream cheese, sugar and egg until creamy.
2. Place 1/4 cup chocolate chips in a microwavable-safe bowl and microwave on high power for about 30 seconds, or until melted;stir until smooth.
3. Beat the melted chips into the cream cheese mixture. With a spoon, stir in the remaining chocolate chips.
4. Fill the cupcake liners 2/3 full with your batter and then drop a heaping teaspoon of the cream cheese mixture into the center of the batter in each cup.
5. Bake cupcakes according to directions.

Wowie! That's a lot of chocolate going on in there!
They plump up so nice! Now you can leave these and eat like so, or get out some frosting and make them that much better! I chose the frosting!

I wanted to use some strawberry frosting and I used a pretty generic recipe as so:
1/2 cup frozen whole strawberries, thawed
1 cup unsalted butter, firm & slightly cold
pinch of coarse salt
3 1/2 cups confectioners' sugar, sifted
1/2 tsp vanilla extract

1. Place strawberries in the bowl of a small food processor; process until pureed.
2. In the bowl of an electric mixer fitted with the paddle attachment, beat together butter and salt on medium speed until light and fluffy. Reduce mixer speed and slowly add confectioners' sugar; beat until well combined.
3. Add vanilla and 3 tablespoons strawberry puree. (I added a lot more because I wanted a strong strawberry flavor!) Mix until just blended.
4. Frost!

I also bought some fresh strawberries (as I was going to make the version @ I heart nap time) so I decided I still wanted to use them on the tops of my cupcakes. I dipped them in melted white chocolate chips and sprinkled some red sanding sugar all over them. Beautiful!
 Some I left without a strawberry but drizzled white chocolate over the tops. The hardness of the chocolate drizzle gave it a nice crunch!

 Top view!


Want to show someone you love them? These will do the trick! :)

Pin It!

Thursday, February 9, 2012

Friends in Blogland!

This post has no cupcakes...(Darnit!) but I feel the need to tell everyone out there how fun and exciting it is to be a part of blogland. I got into blogging by a co-worker who also has a blog herself..check her out @ http://dottimae.blogspot.com/! She's a very crafty lady! :)

Anywho, I love to bake and show off what I can do and that was my intentions when first joining blogger. And then, as I started joining into parties and seeing all the wonderful things that everyone else can create out there it just blows my mind! It makes you feel like we are just one big family.

So here it is, my thank you to all my followers (hopefully more to come in the future, I'd love to have you all!) and to all who let me join in on the fun of partying it up (every day!!!). What more could you ask for then to join in on a party every day?

Over at the Tattered Tag she is having a "New Neighbor on the Blog" Hello..cool!!! Great idea for new bloggers to get out there and a great chance to make new friends! So stop on by if you are a new blogger or old and check it out!


I think I've babbled enough so until next time, keep bakin'/craftin'/whatever you do that's awesome! And thank you for stoppin' by My Little Cupcake!
Pin It!

Tuesday, February 7, 2012

Valentine Funfetti Cupcakes w/ Jello Frosting

Well..it's almost that time of year again when cupid is out flying around, the X's & O's are being tossed around and the smell of roses in the air is almost too much to even handle. I just love it!

I think funfetti cupcakes are so playful and fun that it was about time I gave them a try. I have some cute heart sprinkles that really made these cupcakes V-Day worthy!

Here is the homemade funfetti cupcake recipe that I used~

*Makes 12 cupcakes.

Ingredients:
1/2 cup butter
1 cup sugar
2 whole eggs
1 tablespoon vanilla extract
1 1/2 cups flour
1 teaspoon baking powder
1/3 cup milk
1/3 cup sprinkles

Directions:
1.Preheat oven to 350 degrees F.

2. Cream butter & sugar in the bowl of an electric mixer until fluffy. Add eggs & vanilla & beat until combined.
3. Combine dry ingredients in a bowl. Add half of the dry ingredients to your mixture. Mix until just combined. Add the milk, and once mixed, add the rest of the dry ingredients. Fold in sprinkles!
4. Pour batter into cupcake tin lined with liners and fill 2/3 of the way full. Bake for 18-20 minutes. Let cool on cooling rack.

I thought this batter was so pretty that I had to take a picture for you all!

Now seriously, isn't this just pretty!? Makes ya all warm & fuzzy inside right?! RIGHT!? :)

I pulled these cupcakes out of the oven and was very pleased at how well they baked up. They were perfect little cupids...I mean angels.
Those heart sprinkles just 'pop' out so nicely!


Let's get to this jello frosting. I recently discovered jello frosting (thank you Pinterest!). It was so easy and well, easy. That's really the best word I can use to describe making this frosting. It is light, fluffy, sweet and pretty! What more do you want!? Best of all, you get to pick out of so many different flavors!

Here is what you will need:
3 oz package of Jello
2/3 C sugar
1 egg white
1 tsp vanilla
1/2 C boiling water


Here is what you will do:
1. Put everything except the boiling water in the bowl of your stand mixer fitted with the whip attachment.
2. Turn the mixer to high and add the boiling water.
3. Whip on high for five minutes. (I put a towel around the top of the bowl cuz this jello flies!).
4. Turn off mixer and there you have it! Jello frosting!

Now frost away! & add some sprinkles because you can never have too many!
The jello frosting has some shiny specs in it, making this even more festive for the Valentine theme!
I added a few fondant flowers for a little jazz.

You wanna see what the insides look like? I suppose I can let you peek!
mmmm! A light and fluffy cupcake with sweet air-y frosting. What is there not to love? Cupcake-will you be my Valentine?!

I partied @

Pin It!