Thursday, April 26, 2012

Lemon pound cupcake with blackberry & raspberry frosting

Who likes fruity cupcakes? This girl!

I'm really starting to get into summery things because I just cannot wait anymore for the warm weather so I thought what tastes more like summer than a lemon cupcake? I mean, c'mon!

I found a great looking recipe for a lemon pound cake with blackberry and raspberry buttercream frosting. How amazing does that sound? Let me tell you, they were awesome x 10!

Here is the recipe and ingredients I used:

For the cupcakes:
3 cups all purpose flour
1 teaspoon salt
1/2 teaspoon baking powder
1/2 teaspoon baking soda
2 sticks unsalted butter, softened
2 cups sugar
3/4 cup plain yogurt (I used vanilla flavored)
3 tablespoons lemon zest
2/3 cup lemon juice
5 eggs

For the blackberry and raspberry frosting:
2 1/2 sticks unsalted butter, softened
1 teaspoon salt
2 1/2 cups powdered sugar, sifted
1 cup blackberries
4 teaspoons sugar
2 teaspoons lemon juice
1 cup raspberries

To make cupcakes:
1. Preheat oven to 350 degrees F. 
2. Line 24 muffin cups in cupcake tins.
3. Sift together the flour, salt, baking powder and baking soda in a large bowl and set aside.
4. In a stand mixer, beat butter and sugar until smooth.
5. In a medium bowl, stir together yogurt, lemon zest and lemon juice.
6. Add the eggs to the butter mixture one at a time, beating in between each one.
7. With the mixer on low speed, add the flour mixture in 3 parts, alternating with the yogurt mixture in 2 parts.
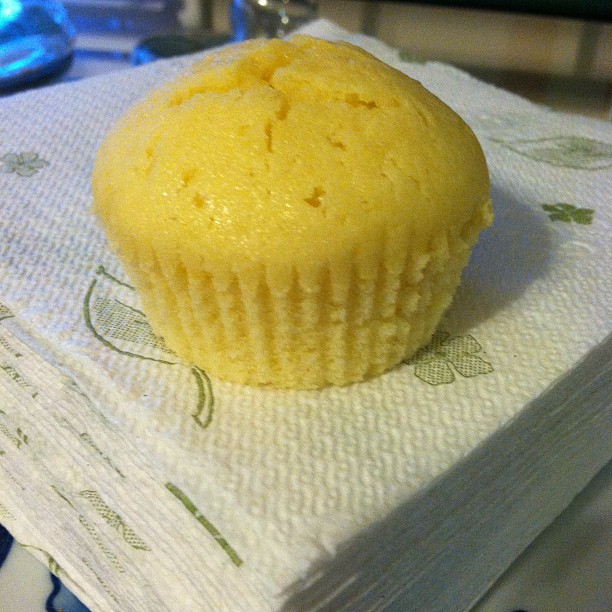
8. Fill muffin cups almost to the top. Bake for 16 minutes, rotating pan after 8 minutes. Remove from oven and let cool on cooling rack.

To make frosting:
To make the frosting you will need to make blackberry sauce and raspberry sauce. 
To make the blackberry sauce:
1. Combine 1 cup blackberries, 2 teaspoons sugar and 1 teaspoon lemon juice in a sauce pan and place over medium heat. Stir frequently until juices from berries boil.
2. Using a wooden spoon, crush the berries in the pan.
3. Let boil for 2 minutes to make sauce more dense. Strain the mixture if you prefer to have smoother frosting. Cool in refrigerator.

Do these same exact steps for the raspberries.

Once you have the sauces made, Beat butter and 1 cup of powdered sugar until smooth. Divide into two parts, removing half from the mixer bowl. Add the blackberry sauce to the mixer bowl along with 3/4 cup of powdered sugar. Place buttercream in a piping bag and pipe a circle around the outer edge of the cupcake. 

In the same bowl, add the raspberry sauce and 3/4 cup powdered sugar and beat until smooth. Once again, place into a piping bag and dollop into center of blackberry frosting. 

There you have it!


 These were the perfect cupcake to satisfy my summer kick!

I also tried out a root beer float cupcake recipe. The cupcake itself turned out great, tasted just like root beer! The frosting, not so much. I will attempt them again, but I will let you take a peek at how they looked...

 Pretty cute huh?! I thought the little gummy bottles added a nice touch. 

Pin It!

My first ever fondant covered cake!

Ok folks, this was a big, big, BIG day for me. I have always wanted to try and make my own fondant covered cake, so I went for it. It was so fun! (A little stressful at times) but I got through it and was very proud of myself. I knew that I was pretty good at the whole frosting technique but I really wanted to try out the fondant. Would you like to see how I pulled it all together? :)
 Alrighty, first I baked all my cakes. I just used some box cake mix for these since I didn't know how it would all be turning out. Then I sliced off the tops to make them all nice and flat and stack-able.
I then whipped up some frosting and it turned out surprisingly well. It really held its shape and was perfect for decorating the cake. I believe I used a recipe from the Wilton website. Cannot go wrong with that right?


  I then made all the other cakes smooth on top, plopped some frosting on top of one and started stacking. Looking nice, looking nice...
 Bottom part complete. I frosting around the edges and now time for the fondant..dun dun dun!!

 Got the fondant all rolled out and on top of the cake...
 Look at how smooth that is! :)
 Got all the excess cut off and I'd say I did a pretty good job!

I stacked 2 cakes on top of one another and then I made a smaller cake to go on top of this one.
 Now I just wanted to have fun with it. Since this was a practice cake, I didn't care if colors matched and what not. Pretty much just experimenting. I started with a border on the bottom..
 I was testing out some cutters. Do I like this look?...Not really, but like I said, experimenting!
 Alright, so I came to a point where I really liked the bottom border and I wanted to see what it would look like if the whole cake was covered like it, so I started and unfortunately I ran out of frosting! Shame on me, it couldn't be because I was tasting it here and there..nooo definitely not!

So there you have it! My first ever fondant covered cake. Will there be more attempts? I sure do hope so! They really take a lot of time and patience...oh ya, and to all of you out there who do these...I applaud your skills, because it is hard to make them look so good! 

Hope you enjoyed my fun time! I always look forward to seeing what everyone else can do! 

I partied @
Frugal Friday
Pin It!

Low carb peanut butter cookies

I know what your thinking..low carb cookies, ick. 
I will be the first to say that low carb is not really the easiest thing in the world to do, especially the first day when your tummy starts to rumble saying mean things like "Hey you, feed me before I really get mad!" or "You may think your fat but I like food!" 
Yeah, heard these a few times. So when I was told of these cookies that are very low in carbs I finally realized that low carb does not always have to be so ... blah.

These are very very simple to make. Only 3 ingredients. Yes, 3. Don't believe me? 

1 cup peanut butter (I buy the lowest carb count you can find)
1 cup splenda (Or other sugar substitute)
1 egg.

Mix together, spoon into ball shape and line them up on a baking sheet. Press down using a fork. Bake for about 8 to 10 minutes on 350.
Done.

Ha! How simple was that?

And to be honest with you, they are pretty good! It gives you the feeling as if your "cheating" when really, they are no more than 2 grams of carbs per cookie. 


 They may not look like your average peanut butter cookie but when your dieting, does anything look normal? bahaha nope!

So if your ever doing the "low carb" diet, try these! They will give you a little satisfaction when your craving the sweet stuff!

I partied @
Frugal Friday
Shine On Fridays
Serenity Saturday
Sweets For A Saturday
Mix It Up Monday
Talent Tuesday
Crazy Sweet Tuesday
Sweet Treats Thursday
Whimsy Wednesday
Pin It!

I love these oatmeal cookies!

Oatmeal cookies are probably one of my all time favorite cookies. Snickerdoodles come in at a close 2nd though. 

I like when a cookie recipe is simple and fast to make, and this oatmeal cookie recipe is just that. They turn out amazing too, BONUS!

I found this recipe on Smitten Kitchen. Great place to go if your looking to make some treats! There are beautiful pictures as well!

 Are they not delicious looking or what!? 

Lets get you making these shall we?

Here is what you will need:
 1/2 cup butter, softened
2/3 cup light brown sugar, packed
1 egg
1/2 teaspoon vanilla extract
3/4 cup all-purpose flour
1/2 teaspoon baking soda
1/2 teaspoon ground cinnamon
1/4 teaspoon salt
1 1/2 cups rolled oats
3/4 cup raisins (I did not use raisins because I don't like them)
1/2 cup walnuts, chopped (optional)

Directions:
Preheat oven to 350°F (175°C).
In a large bowl, cream together the butter, brown sugar, egg and vanilla until smooth. In a separate bowl, whisk the flour, baking soda, cinnamon and salt together. Stir this into the butter/sugar mixture. Stir in the oats, raisins and walnuts, if using them.
At this point you can either chill the dough for a bit in the fridge and then scoop it, or scoop the cookies onto a sheet and then chill the whole tray before baking them. I choose to make them into balls and then put them in the freezer for a bit.
The cookies should be two inches apart on a parchment-lined baking sheet. Bake them for 10 to 12 minutes), taking them out when golden at the edges but still a little undercooked-looking on top. Let them sit on the hot baking sheet for five minutes before transferring them to a rack to cool.


 I pretty much just plop my dough in big spoonfuls, that way I get a pretty large cookie out of it. These bake up golden brown and softer than ever! I honestly don't even think they lasted a whole day...is that bad? :)

I partied @
Frugal Friday
Shine On Fridays 
Serenity Saturday
Sweets For A Saturday
Mix It Up Monday
Talent Tuesday
Crazy Sweet Tuesday
Sweet Treats Thursday
Whimsy Wednesday
Pin It!