It has actually been awhile since I've last been on blogger...sad! I've been working really hard at rummaging, thrift saling, Craigslisting, Goodwilling, the list goes on! Why have I been doing this? Well, I started an Etsy store and I love love love vintage items, and searching for them is a blast! So I will go find steals on antique/vintage/just plain cute items and resell them on Etsy. Otherwise, I have been making things as well to sell in a spot at a junk store that finalllllly after a long wait, I got a spot in! Wahooo!
June 1st I get to move my crafts in and start to sell...(fingers crossed!)
So that is why I have been away, workin' my tail off. Would you like to see some of the results of all my time away? Aww, you're too sweet :)
Here is a picture I picked up at a church rummage sale for about a buck. I took out the glass, painted the picture with chalkboard paint, painted the frame a different color, distressed it, and what do ya know....here's how it turned out!
I think it turned out great!
Moving on...
I really like when people paint and distress wood signs so I thought I'd give it a shot. I have only done 2 so far, but I am soo proud of them :)
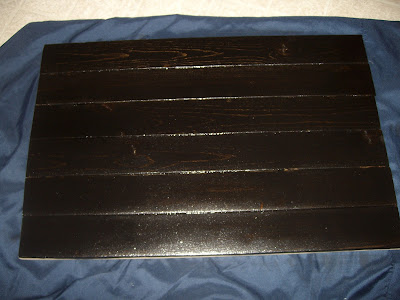
Now how I do mine is I have my bf sand my boards, glue them together and put a hook on the back to hang them up.
Then it's allll mine!
First I paint the solid color. In the 2 boards I have made so far, I have used a dark stain.
Once I have it painted all one solid color, I print out my words that I am going to use. Then i take a piece of chalk and color all over the back of the letters, then lay them on the board where you want them and trace the letters with a pen or pencil. This will leave a chalk outline of your letters.
Then I picked the color that I wanted the back to be (I'll tell ya later how I made it easier on myself starting the 2nd sign.) Therefor the letters were going to be the dark stain color, and I chose a teal color for the background. Now you have to paint around all of your letters that are now in chalk.
Once you have gone over it twice, you can take a little sandpaper or steel wool to the corners and all around and then go over it with a clear coat. I LOVE this sign! :)
Now you may be thinking that this would take a lot of time, and maybe you don't want to paint around every letter. WELL, that's where my brain finally kicked in. I went and bought some paint pens so now you will only have to paint your background color, and then paint your letters on using the pen. MUCH easier! (As I did in the first picture.) Try to make a sign, so much fun! You will impress yourself!
Well, I am kind of really into the whole chalkboard thing at the moment and I live in such a tiny apartment that it is hard to keep everything nice and tidy. I decided to try starting with one room and making it ...."nice" Is that a good enough word? Nice.
Well I started with my bathroom and who doesn't want a nice bathroom right?
I busted out the chalk paint, cut out some cute labels from some plain old sticky labels and painted them. Then I put them on some dollar store glass jars and BAM! Say hello to organization!
Then I moved on to an antique frame I bought. It was gold in color and my bathroom has a black and white theme going on so it just wasn't going to cut it. I spray painted the frame black and added a little scrapbook paper with some jewel embellishments and I think that it really added a cute vintage touch to my bathroom!
So in love.
Anyways, look what Pinterest has done to me!
I am like a crafting zombie, and I really don't have room for all of the things I want to do..which is probably why I had to rent a spot in a junk store so I could sell some of it.
Hey, if you love doing it, why not right?
If you get some spare time and would like to check out my Etsy store, by my guest! I would love to have you :)
Head on over and check out DottiMae
Until next time, keep bakin! (& Craftin!) ;)
I partied @
Talent Tuesday!
Link it up Thursday!
Show Off Monday!
Whimsy Wednesday!
Frugal Friday!
I partied @
Talent Tuesday!
Link it up Thursday!
Show Off Monday!
Whimsy Wednesday!
Frugal Friday!


