Saturday, August 11, 2012

Zebra Birthday Cake Fail!

I hate that word.
Fail.
yuck!

But we've all done it once in our lives and failing is not that bad, really. 
I was asked to make a birthday cake from my sister. She wanted it to have pretty pink hearts and an anchor. Simple right?

That's what I thought! I made all the fondant pieces ahead of time and had them all ready to go. Then I baked all the cakes ahead of time making them cool zebra print! I have always wanted to try the zebra cakes and I figured why not try now. Who wouldn't want to slice into their cake and have some crazy blue and pink zebra stripes jumping at them? I know I would!

So I get to the day where I need to assemble this cake. I'm pumped! I stack the cakes and I'm feeling really good about it. I had also baked some cupcakes that I was taking back home as well so my apartment was starting to get pretty roasty toasty if you know what I'm saying. 90 degree weather, and the AC kickin', my frosting was just a mess! I had piped on some pretty pink flowers around the cake and all of a sudden they just started melting.

I panicked! 

A few words were mumbled and needless to say, she didn't get her cake. I did slice into it though to give ya a look at how it did turn out.


 At least it was pretty! 

I still wanted her to have a special treat so I did make an extra special cupcake in her honor.

 You win some, you lose some. In this case, I fought the frosting and the frosting won. 

At least the cupcakes turned out great! Next time maybe I won't try baking so much at once. Sometimes I think I may go a bit overboard :)

Enjoy!

I partied @
Crazy Sweet Tuesday!
Pin It!

Thursday, August 9, 2012

Sweet Felt Flower Wreath

Hello friends! 
Are you ready for some wreaths? 
I have been addicted to making wreaths lately and I cannot stop! First off, they are so much fun to make and secondly, you get done with one..then you browse around on Pinterest and find a new cute one to make. It is like a never ending wreath story. 
I'm sure everyone and their neighbor has seen the felt flower wreath and all those tutorials out there, so forgive me for showing all the steps but if your like me and have never tried to make something before, I like to see how it's done right away so I don't have to blog-hop to try and find a tutorial. 

So here goes nothing. Forgive me, the pictures were taken with my iPhone and for some reason I was not very good at taking photos that day.

So first off, I wrapped a styrofoam wreath with some linen I bought at Walmart for pretty cheap. To start this, cut your linen into long strips then just start at one point, using hot glue to secure the fabric onto the wreath, and start wrapping. 

Round and round you go...


Getting dizzy? :)

While wrapping the fabric, I glued here and there just to make sure the fabric would stay in place and glue once more and the end.
Okay, here is what your wreath will look like when you're all done.


I like how the fabric ravels a little so I didn't worry about the loose strings here and there.

Now we get to make the flowers! Best. Part. Ever.

I had so much fun making these flowers. I bet you will too!

I'll start off with an easy one. 

Take a piece of felt (I started with a piece that was about a foot long). Cut a strip the long way as wide as you would like.


Fold this piece in half and glue the open edge down using hot glue. 


On the folded edge, start cutting slits right up until just where you glued. Continue to cut slits the whole length of the felt. 


You can make these slits as far apart or as close as you like. I do random sizes to make different sized flowers. 
Starting at one end, roll the fabric and glue as you go like so:


Keep rolling and gluing until you get to the end and there it is! Simple as that. 
Flower one complete!


Ready for round two? Me too!

This one I'd say is probably as easy as the last one. First of all, cut a circle.
Yup, that's right, just cut a circle.


Next, cut a swirl into the circle.


Easy peeeeasy...told ya!

Are you ready to roll? Here we go again!

Starting at the outside edge, start rolling...


You don't have to glue along as you go because once you get to the end you will secure with glue.

So now your done rolling and you will have the end piece left. Fold down the end piece and secure with hot glue. This will hold it all together.


There you have it!! All done with flower #2.


Isn't it pretty!?

Okay onto the final flower and it's a doozy.

It is not really that hard but it is the one that takes the longest to make. 

Start by cutting out 5 big flowers and 1 smaller flower of the same shape.
I used a template so they would all actually resemble each other :)


You're thinking "Why does she have 2 smaller flowers?"
Well, I thought that I was going to use them both but I only used one so X that one out of there!
Also, I used 6 big ones, not 5 as pictured above....lessons learned I must say.

Now, one piece at a time, fold it in half and secure with a dot of hot glue. Then fold in half one more time and secure once again with a dot of glue. Do this to 5 of the 6 pieces.


Once they are all glued, take 4 of the big petals and glue them onto one petal that has not been folded so they are all touching in the center like so:


Next, take one more big petal and the smaller petal and glue them into the center of this.
Fluff them up and there you have it!
The final flower! So pretty! :)


Now that you have 3 flowers done, start making a bunch of them, as many as you want! Go crazy!
I made them in all different shapes and switched the colors up a bit.


With your hot glue gun fired up and ready to go, start gluing all your pretty little flowers on the wreath. I did just part of the wreath because I like this look, but you could go all out and cover the whole thing if you wanted to. Add a piece of ribbon (I wrapped mine around the back and up to the front and tied a cute bow).

Here is how mine turned out!


Totally in love with this thing!

Another peek? Why not!


And there you have it, one of thee cutest wreaths made by yours truly. :)

I think I could do this all day, not sure if there is enough felt in the world for this...


Here are some of the other wreaths I've been working on, let me know what you think!


 I absolutely fell in love with the American flag felt wreath when I saw it and instantly made one. I glittered my stars and hung it loud and proud for the 4th of July.

 Then I decided that football season was coming up so I better show my Packer pride and really get those colors showing. So there is my Green Bay Packer felt wreath!

 Then there's the music paper wreath that I just adore! I placed a cutout circle using glittered paper in the center which really added a special touch. The lace ribbon used to hang this makes it a whimsy piece that adds so much to any room.

 Boy oh boy, a little over board? Eh, I could keep doing this forever. Watch out blog friends, there will probably be more coming at ya!

Thanks for stoppin' by!
Pin It!

Tuesday, July 31, 2012

These Cupcakes are Bananas!

Does anyone else ever get a craving for bananas? 
I started to think I was going bananas for how much I wanted one! 
Then the LIGHT BULB came on and I was like "BANANA CHOCOLATE CHIP CUPCAKES!"
Hellllloooo...Awesome idea! 

So I went onto good ol' Google and searched for a recipe to get myself goin' and low and behold, I think I may have found the best cupcake recipe out there! (Ok, so every cupcake recipe kind of turns out to taste like the best, but these were so good...!)
The recipe I used was from Baked Perfection. 
Stop on over there and check out her blog, it's a real treat!

And that my friends is where these bad boys came from
 There is just something about bananas and chocolate..and that something is sooo good!

If you would like to try these on for size here is what you will need:
FOR THE CUPCAKES:
1 cup flour
1/2 teaspoon baking powder
1/2 teaspoon baking soda
1/2 teaspoon salt
1 stick butter, softened
1/2 cup sugar
1/4 cup milk
2 teaspoons vanilla extract
2 eggs
2 ripe bananas, mashed
3/4 cup semi sweet chocolate chips

DIRECTIONS FOR CUPCAKES:
1. Preheat oven to 350 degrees F.  
2. Line a cupcake pan with paper liners. (12)
3. In a medium bowl combine the flour, baking powder, baking soda and salt.  
4. In a large bowl, beat the butter and sugar until combined. Add the milk and vanilla.  
5. Add the eggs, one at a time, beating well after each addition until thoroughly combined.  Slowly beat in the flour mixture, until just combined.  
6. Slowly add in the bananas.  
7. Once all is combined, stir in the chocolate chips by hand.  Divide batter evenly among cupcake cups.  Bake in preheated oven until tops are golden, approximately 17-20 minutes. 

Now before I get into the frosting I just want to say that this is possibly the best chocolate frosting EVER! I should first tell you that it is labeled 'Chocolate Fudge Buttercream Frosting'. Oh yeah, I said it.

In case you didn't read me correctly the first time...Let me say it again...
CHOCOLATE FUDGE BUTTERCREAM FROSTING.

AHHHHH-MAZING!

I almost didn't have enough to frost all the cakes due to my inability to control myself around something so delicious. Did I feel guilty afterwards? Heck yeah but I loved every minute of it!

Okay, so I actually found this recipe on AllRecipes.com and how glad I am that I did, well I can't even describe how happy it made me. I usually have bombed every time when trying to make chocolate frosting. It always gets really dry and not very pretty when piping, but this time, wow. 

Here is the secret recipe ;) 

1/2 cup butter
1/4 cup shortening
1/3 cup unsweetened cocoa powder
2 cups confectioners' sugar
2 tablespoons milk
1 cup hot fudge topping
1 teaspoon vanilla extract

DIRECTIONS FOR FROSTING: 

1. Cream together the butter or margarine with the shortening. 
2. Sift the cocoa with the confectioners' sugar and add to the creamed mixture. Mix together adding 1 tablespoon at a time of milk to keep mixture smooth. Don't add more than 1/4 cup of milk. 
3. Add the hot fudge topping and the vanilla extract. Blend until smooth and creamy. 

There you have it. And yes, there is hot fudge topping in this frosting. Can it get any more naughty than that!? 

I mean, look at it!
 
 
 Now bake those cupcakes up!
And frost!
 And add some banana chips!
Now go on and share them with some friends...but most importantly...

indulge in one yourself.
(I won't tell if you even put a little extra frosting on yours.) ;)

I hope you enjoyed these cupcakes as much as I did. I hope I didn't make you gain 10 lbs just from reading either!

Now lets see what I will be craving next week....hmmm decisions decisions. 
Pin It!

Sunday, July 22, 2012

Chocolate Peanut Butter Layered Cake w/ Chocolate Peanut Butter Glaze

Chocolate Peanut Butter Layered Cake w/ Chocolate Peanut Butter Glaze..Did you catch all of that? 
I strongly recommend making this if you have a chocolate peanut butter lover in your life. I wouldn't say this is my first choice for flavors but I couldn't get enough of this cake! It was just that good!

The layers of peanut butter frosting with Reese's Peanut Butter Cups and the wonderfully smooth chocolate peanut butter glaze on top really make this a rich and delicious..and AMAZING cake. 

I am going to get right to it, enough talking, more baking!

Ingredients for the cake:
2 cups all purpose flour
2 1/2 cups sugar
3/4 cup unsweetened cocoa powder
2 teaspoons baking soda
1 teaspoon salt
1 cup canola oil
1 cup sour cream
1 1/2 cups water
2 tablespoons distilled white vinegar
1 teaspoon vanilla extract
2 eggs

Directions for cake:
1. Preheat oven to 350 degrees F. Line the bottom of three 8-inch round cake pans with parchment paper then butter the sides of pans.
2. Sift the flour, sugar, cocoa, baking soda and salt into a large bowl. Whisk to combine them well. Add the oil and sour cream and whisk to blend.
3. Gradually beat in the water. Blend in the vinegar and vanilla. Whisk in the eggs and beat until well combined. Scrape down the sides of bowl as needed.
4. Dived the batter among the three cake pans.
5. Bake for 30-35 minutes or until a toothpick inserted comes out clean. Let cool in the pans for about 20 minutes. Invert cakes onto wire racks, carefully peeling off the paper liners. Put into freezer for about 10 minutes to firm them up before frosting.


Ingredients for peanut butter frosting:
10 ounces cream cheese, room temperature
1 stick unsalted butter, room temperature
5 cups confectioners' sugar, sifted
2/3 cup smooth peanut butter

Directions for peanut butter frosting:
1. In a large bowl with an electric mixer, beat the cream cheese and butter until light and fluffy. Gradually add the confectioners' sugar 1 cup at a time, mixing thoroughly after each addition and scraping down sides of bowl as needed. Continue to beat on medium speed until light and fluffy, about 3-4 minutes.

This frosting is to die for! Just picture it, cream cheese and peanut butter..mmm!! Anything with cream cheese is a hit in my book though! ;)

Now we get to assemble this thing! 

Grab your cakes, frosting and some Reese's.
 Unwrap and chop up your Reese's. You can use as many as you like. I cannot remember how many I used but it's really up to you and how your feeling that day. :)

Start with your first layer and spread some frosting on the top followed by some crushed Reese's. Next, add on your next layer of cake and repeat. 

 Finally, put on the third layer of cake and now you are going to frost the whole sha-bang! 
Have at it! Go crazy! 

Make it look nice and smooth...
Or if your like me, you can at least try..
 Beautiful isn't it? 

Now time for that chocolate peanut butter glaze. Yes!

Here is what you will need:
6 ounces semisweet chocolate, coarsely chopped
3 tablespoons smooth peanut butter
2 tablespoons light corn syrup
1/2 cup half and half

And here is what you do:
1. In the top of a double boiler or in a bowl set over simmering water, combine the chocolate, peanut butter and corn syrup. Cook, whisking often until the chocolate is melted and the mixture is smooth.
2. Remove from the heat and whisk in the half and half, beating until smooth. Use while still warm.

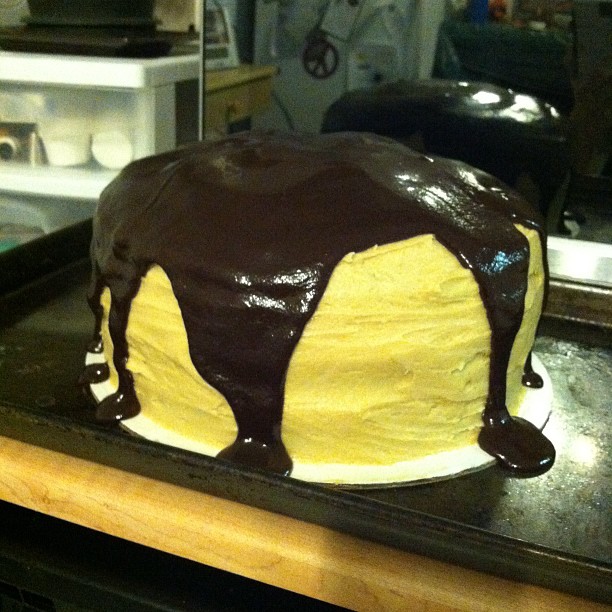
 Here is the fun part (besides eating it!) Take the chocolate pb glaze and pour right over the top of the cake. It will start to run over the sides of the cake and make a very pretty topping! Make sure to have a pan underneath your cake to catch all the glaze that will drip off. 


There you have it! One of thee best chocolate peanut butter glazed cakes that I have ever had! 

Put that rich and delicious beauty right on the pedestal it deserves, then dig in!


 Ohhh yeahhhhh! 

Wanna peek inside? I'll let ya take a look...
 Amazing! 

Have a glass of milk on hand when trying to tackle this, it will be greatly needed. 

Pin It!

Baked Doughnut!

Doughnuts are one of those things that when you think about one, you have to have one! That's why when I was walking down the aisle at Target and seen a doughnut pan on clearance (Clearance Queen here) I had to have it, and I had to use it...right away....like that day...no joke.

The pan had an easy peasy recipe right on it so I swung my cart around and headed down the food aisles collecting the odds and ends that I did not already have at home. 

I have never had a baked doughnut before, but I had to give it a shot. And since it's baked, it's good for you right? ;) 

I also couldn't decide what i wanted to top my doughnuts with. I love chocolate so okay, I am going to top them with chocolate glaze. Then I thought "Ohhh, I love powdered doughnuts!" Okay, so I will top half with powdered sugar. Then cinnamon sugared doughnuts popped into my head and it was all over from there. I was making all 3. Nobody was talking me out of it.

It was almost like I had to turn my brain off so I would stop thinking of new ideas, otherwise I would have had each doughnut with a different topping! I guess that wouldn't have been so bad, but then I would have had to try them all...which probably wouldn't have been such a hot idea. Eh, I've been known to down a few doughnuts in my day, I bet I could have done it! :)

Here is the recipe that I used on the Wilton doughnut pan:

Ingredients:
2 cups cake flour, sifted
3/4 cup granulated sugar
2 teaspoons baking powder
1/4 teaspoon ground nutmeg
1 teaspoon salt
3/4 cup buttermilk
2 eggs, lightly beaten
2 tablespoons butter, melted

Directions:
1. Preheat oven to 425 degrees F. Spray doughnut pan with non-stick cooking spray.
2. In a large bowl, sift together flour, sugar, baking powder, nutmeg and salt. Add buttermilk, eggs and butter; beat until just combined. Fill each doughnut cup approximately 2/3 full.
3. Bake 7-9 minutes or until the top of the doughnuts spring back when touched. Let cool in pan for 4-5 minutes before removing. 
4. Finish off doughnuts with topping (or toppings) of your choice. 

This recipe made 12 delicious doughnuts!

For the chocolate glazed doughnuts, here is how I made the chocolate glaze:

Ingredients:
1/4 cup semisweet chocolate chips
1 tablespoon butter
1 tablespoon corn syrup
1 teaspoon hot water

Directions:
1. In medium bowl, microwave chocolate chips, butter and corn syrup for 1 minute, stirring frequently until completely melted. Stir in 1 teaspoon of hot water until the glaze is thick and smooth. Use immediately. 

That was easy huh? Just dip the tops of those doughnuts right in the glaze and set on a cooling rack. I advise to put a pan underneath to catch all the drippings. Easy clean up. That is the way I like it!


 Look how smooth that chocolate looks!! 

Now we have the powdered sugar doughnuts. No big thang here, just need some powdered sugar and a baggie. Once the doughnuts are out of the oven and cooled a bit, drop a doughnut in the baggie with some powdered sugar and shake....shake shake...shake your booty! (might as well, all that work will give you room for 1 more bite!)


 Yummy! I tried to get more powdered sugar to stick, but it wouldn't. They were good either way.

Last but not least we got the cinnamon sugar doughnuts. Here is what I used:

Ingredients:
2 tablespoons granulated sugar
1 tablespoon ground cinnamon
2 tablespoons butter, melted

Directions:
1. In a shallow bowl, stir together the sugar and cinnamon.
2. Dip the baked doughnut in the melted butter and roll in the cinnamon sugar mixture to coat. 

That's it! 

  
 I would have to say that it was a close tie between the sugared and chocolate glazed doughnuts as being my favorite. 


 Arrange on a plate and show off those beauties! People will think they were store bought! 
I would also have to say that they were best eaten right away (well, what isn't?) because day 2, they were a bit soggy. Enjoy!

Pin It!

Wednesday, July 4, 2012

Chubby Hubby Cupcakes...Hubba Hubba ;)

What comes to mind when you hear the words Chubby Hubby?
My first thought is something that is really unhealthy for you, and very rich, and very fattening....and ohh so good! 

I am so right.

 Drooling yet? 

I never could have imagined so many flavors in one cupcake...I guess that is why I had to make these giant ones. See how big those suckers are? 

They are a yellow cake battery, peanut buttery, chocolate ganachey, sweet and salty crunchy good time. Ohhhh yeah!

These take a little bit of extra work to make but in all reality, sitting down and eating one of these totally makes all the sweat and hard work worth it! Now lets get down to business here and get you making them yourselves!

I got this recipe over @ Annie's Eats. Thank goodness for such talent :)

Here is what you will need to get these babies started...

For the cupcakes:
 3 cups cake flour
1 tbsp. baking powder
½ tsp. salt
2 sticks unsalted butter, at room temp
 1½ cups sugar
1 cups malted milk powder
5 large eggs, at room temp
1 tbsp. vanilla extract
1¼ cups buttermilk, at room temp

For the ganache filling:
8 oz. bittersweet chocolate, finely chopped
1 cup heavy cream
4 tbsp. unsalted butter, at room temp
1½ cups coarsely chopped pretzels

For the frosting:
3 sticks unsalted butter, at room temp
1 cup creamy peanut butter
4½ cups confectioners’ sugar, sifted
Pinch of coarse salt
2 tsp. vanilla extract
3 tbsp. heavy cream
  

And of course some pretzels and whatever else you want to garnish with!

Get that oven preheated to 350 degrees F and lets get to mixin'.
In a medium bowl, combine the cake flour, baking powder, and salt. Whisk and set aside. In the bowl of an electric mixer, beat the butter on medium-high speed until smooth, about 1 minute. Gradually add in the sugar, mixing for 1 minute after each addition. Blend in the malted milk powder. Beat in the eggs one at a time, scraping down the bowl and mixing well after each addition. Beat in the vanilla. With the mixer on low speed, add the dry ingredients alternately with the buttermilk, beginning and ending with the dry ingredients and mixing each addition just until incorporated.  

Got all that? Great! 

Divide the batter into liners in your cupcake pan. Bake for 18-20 minutes. Allow to cool in the pans 5-10 minutes, then transfer to a wire rack to cool completely. 

Now you can start the ganache. Put the chopped chocolate in a heatproof bowl. Put the cream into a saucepan and bring to a simmer. Remove from the heat and pour the hot cream over the chocolate; let stand 1-2 minutes. Whisk together until it becomes smooth. Whisk in the butter 1 tablespoon at a time until completely incorporated. Let stand at room temperature, whisking occasionally, until slightly thickened. 

Now you get to stuff your cupcakes, yes!!

 The way I did it was cut out a hole in the center of each of the cupcakes.

 Using a spoon, fill ganache a little over half way full into the holes. 

Then I chopped up some pretzel M&M's and sprinkled a few into each of the holes just to the top.

You could also use chopped up pretzels, or chopped up anything! Whatever you may be craving that day, throw it in there!

Lets get this frosting started so we can frost our cupcakes and dig in!


Combine the butter and peanut butter in the bowl of an electric mixer. Beat on medium-high speed until smooth. Mix in the confectioners’ sugar and salt. With the mixer on low speed, mix in the vanilla and cream just until incorporated. Increase the mixer speed to medium-high and whip until light and fluffy, about 4 minutes. Do not even try it to see what it tastes like, because you will not stop! I used a ziploc bag with the corner snipped off to frost my cupcakes since I was out of pastry bags, worked just fine! Now frost and then top with whatever your little heart desires. I used some pretzel M&M's, some crushed pretzel M&M's and some whole mini pretzels. 

Ta Da!


 You can totally see why these are called Chubby Hubby cupcakes. I mean, if you fed these to your hubby...he might get chubby. Well, anyone might get chubby. 

Oh and a piece of advice, don't try to eat one of these without a glass of milk on hand. I tried and I failed. Just warning you. 

These cupcakes got a 10 out of 10 from all who tried one, they are a "must make again" for sure!

Enjoy!
Pin It!